Referring Vet Guide
Table of Contents
Registration
To ensure workspace privacy, only referring veterinarians who have received invitations will be able to join.
Here’s a step-by-step guide to get you started:
Accepting the Invitation:
- When you receive an email invitation from radiologists, click on “accept invitation”.
- This action will automatically redirect you to the registration site at www.imagingnet.com.

Alternative Registration:
- Alternatively, you can visit www.imagingnet.com directly.
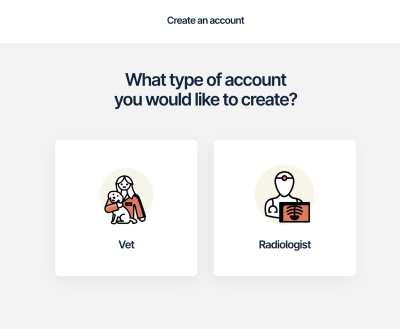
- Click on ‘Register,’ and select the ‘Vet’ option.
- In the pop-up window, enter the email address to which you received the invitation.

Joining the Workspace:
- If your invitation is found, you can directly join the workspace.
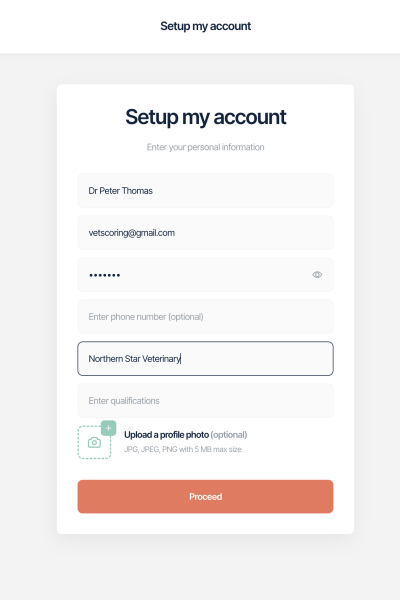
- You will be prompted to set up your account, which includes providing your name and email.
- Set a secure password for your account.
- You also have the option to include your practice name and upload a profile photo/logo to personalize your account.

Uploading Imaging studies
ImagingNet offers two convenient methods to upload imaging studies: direct DICOM send or direct file upload.
Direct DICOM Send:
To configure your imaging modalities or PACS for direct DICOM send, follow these steps:
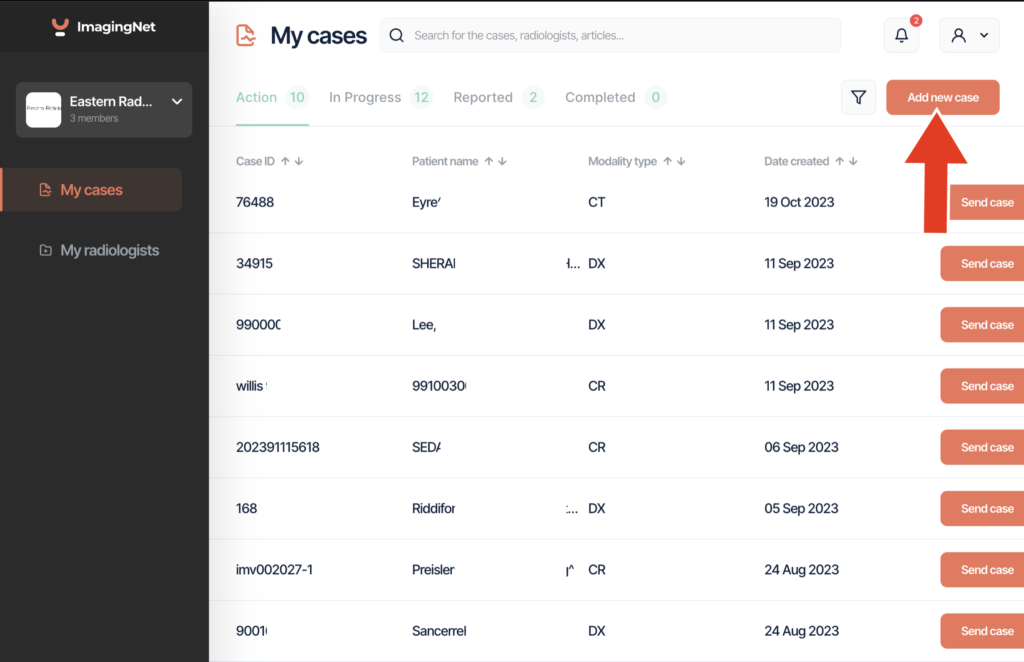
- Click on “Add a New Case” located in the upper right corner (red arrow).
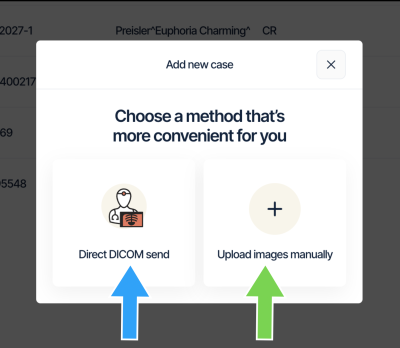
- In the pop-up window, select “Direct DICOM Send” (blue arrow)
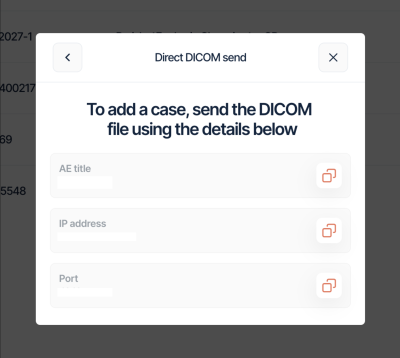
- Copy the AE Title, IP address, and Port by clicking on the copy icon.
- Paste this information into your imaging modalities or DICOM viewer settings.
Direct Image Upload:
For direct image upload, follow these steps:
- Click on “Add a New Case” located in the upper right corner (red arrow).
- In the pop-up window, select “Upload Images Manually” (green arrow)
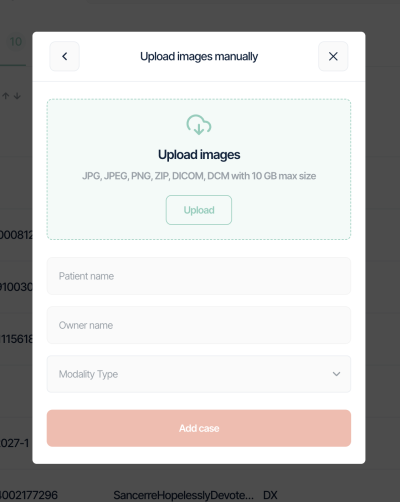
- Drag and drop the files you want to upload from your computer.
- Select the specific files you wish to upload.
Keep in mind that ImagingNet supports various file types, including JPG, ZIP, and DICOM.
Lastly, provide the required patient information, including the patient’s name, owner’s name, and modality.


Referring A Case
Instructions for submitting a case:
- After successfully uploading a study, it will automatically appear in the “Action” column.
- Click “Send Case” located on the right side of the case details (red arrow).
- The submission process consists of three steps:
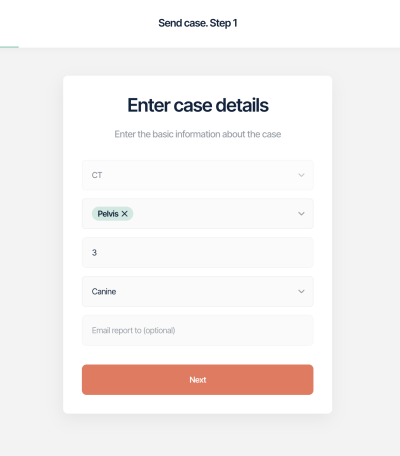
- Step 1: You will be prompted to enter case details, including:
Body regions you want to be reported.
The number of images uploaded.
The patient’s species.
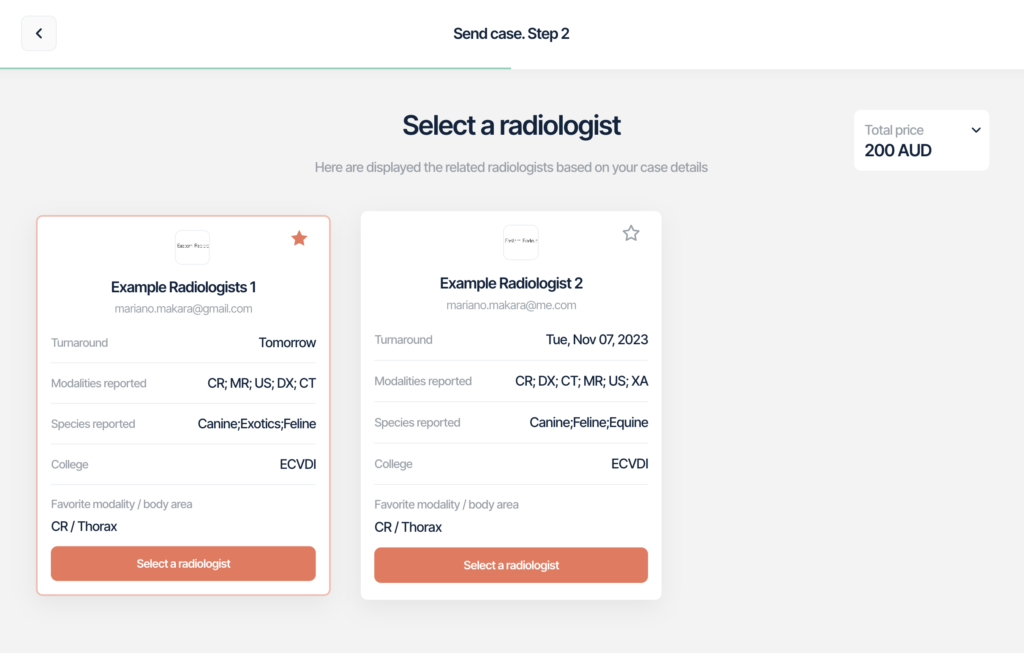
Click “Next” to proceed. - Step 2: Select the radiologist by clicking on “Select a Radiologist.”
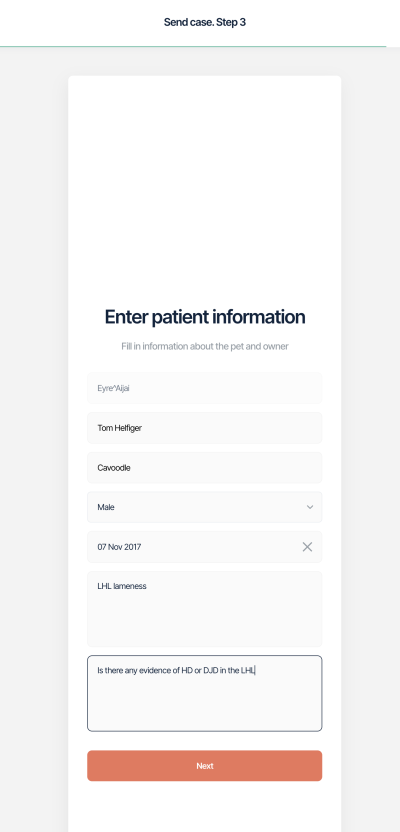
- Step 3: You will need to enter patient information, including:
- Owner’s name.
- Breed.
- Sex.
- Date of birth.
- Clinical history.
- Clinical questions you want to be answered.
- Step 1: You will be prompted to enter case details, including:
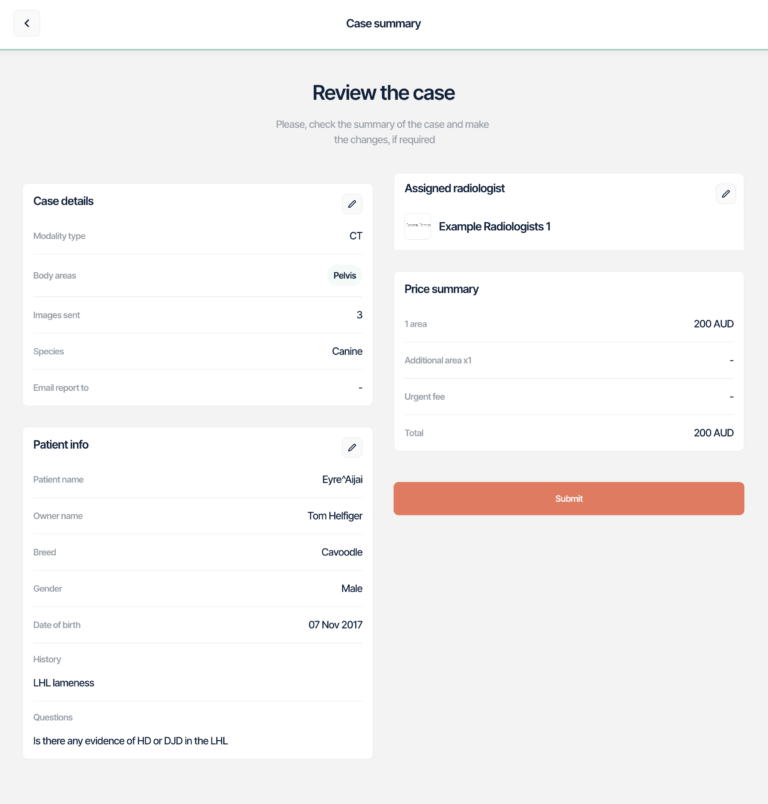
- A summary of the case will be presented, including an automatic estimate of the submission cost.
- After reviewing the case details, click on “Submit.”
- The case will be sent to the radiologists and automatically moved to the “In Progress” list.
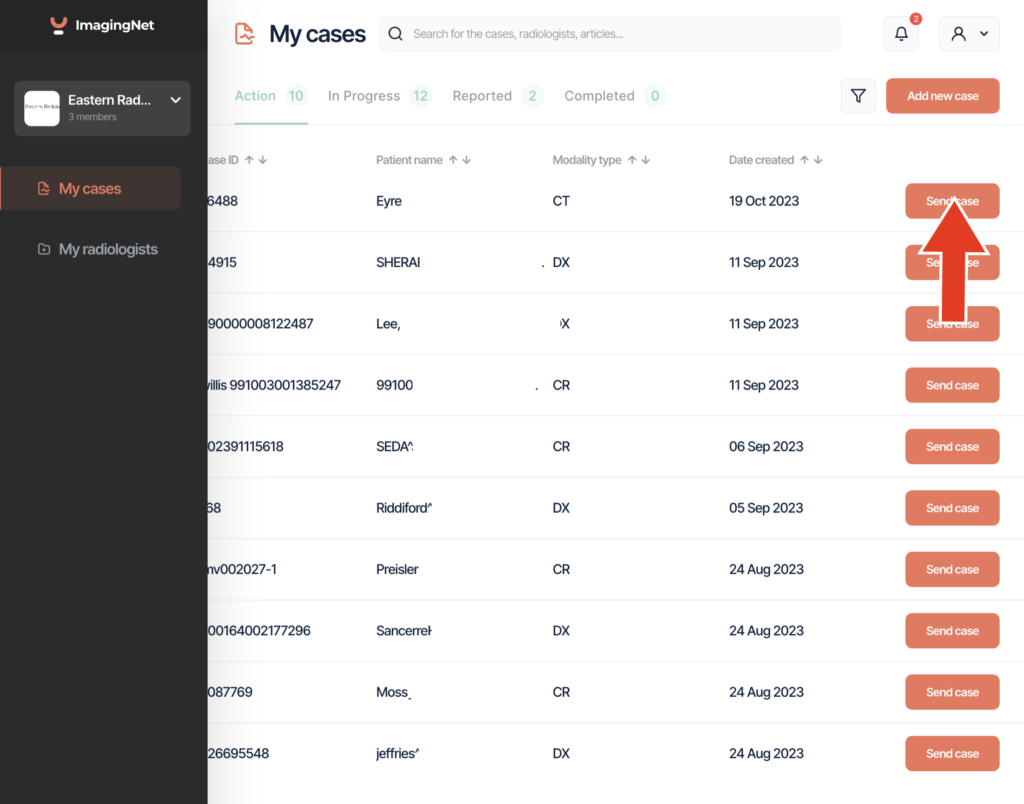
Step 1
Step 2
Step 3
Case Summary
Select a radiologist
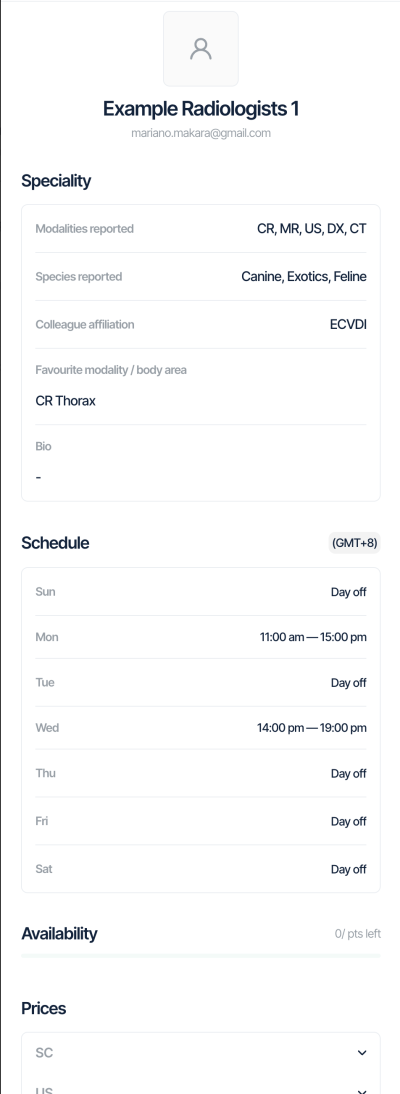
- As a referring veterinarian, you can access important information about the radiologists who will be handling your cases. This information includes their availability, species and modalities they report on, as well as their favourite imaging modality and preferred body region.
This valuable data is conveniently presented on the radiologist’s cards during the submission process, giving you insights into their specialization and schedule.
Instructions for Accessing Radiologist Information:
To access more detailed information about our radiologists, follow these steps:
- Select ‘My Radiologists’ from the side menu.
You’ll be presented with the workspace radiologists’ turnaround time and species and modalities they report on. - If you want to explore even more details about a specific radiologist, including their schedule, availability, and pricing, click on the radiologist’s card. You’ll gain access to comprehensive information, ensuring transparency and providing you with all the necessary details for a successful collaboration with our radiologists.

Turnaround Time estimation
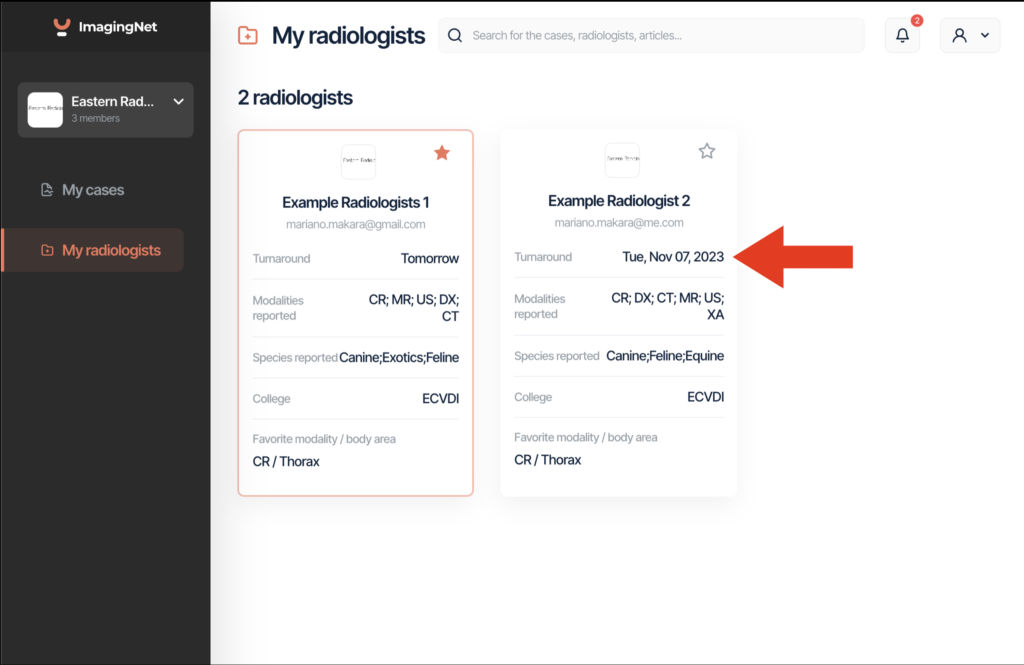
- ImagingNet automatically estimates the turnaround time for each radiologist based on:
- The radiologist’s schedule and availability.
- The number of points per hour allocated by each radiologist.
- User time zones.
- The number of studies already received.
- These estimations are continuously updated to provide accurate and up-to-date information to referring veterinarians.
Turnaround time overview as it appears to referring veterinarians: The first line displays the current turnaround time for each radiologist (red arrow), providing vital information to referring veterinarians at a glance.
Accept or return the report
Instructions for managing reports:
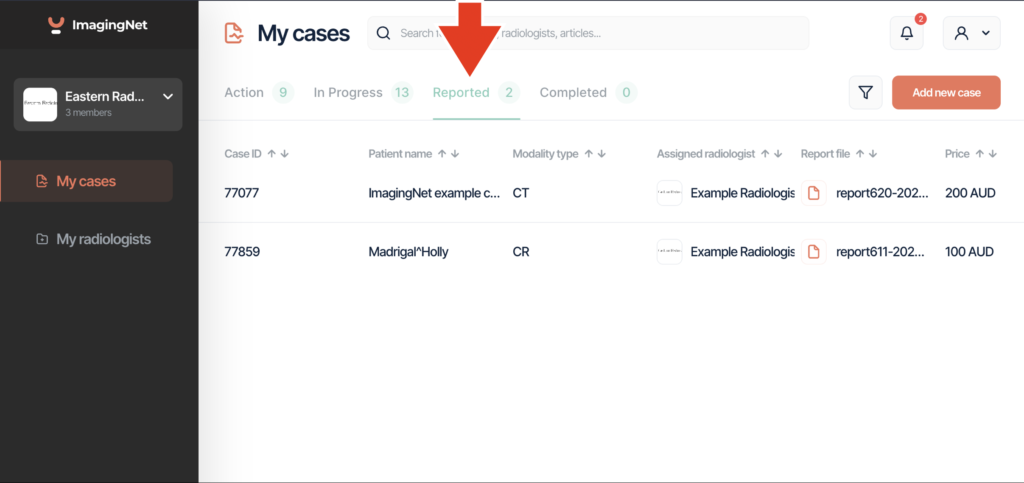
- Once the radiologist sends the report, it will automatically appear in the “Reported” list (red arrow).
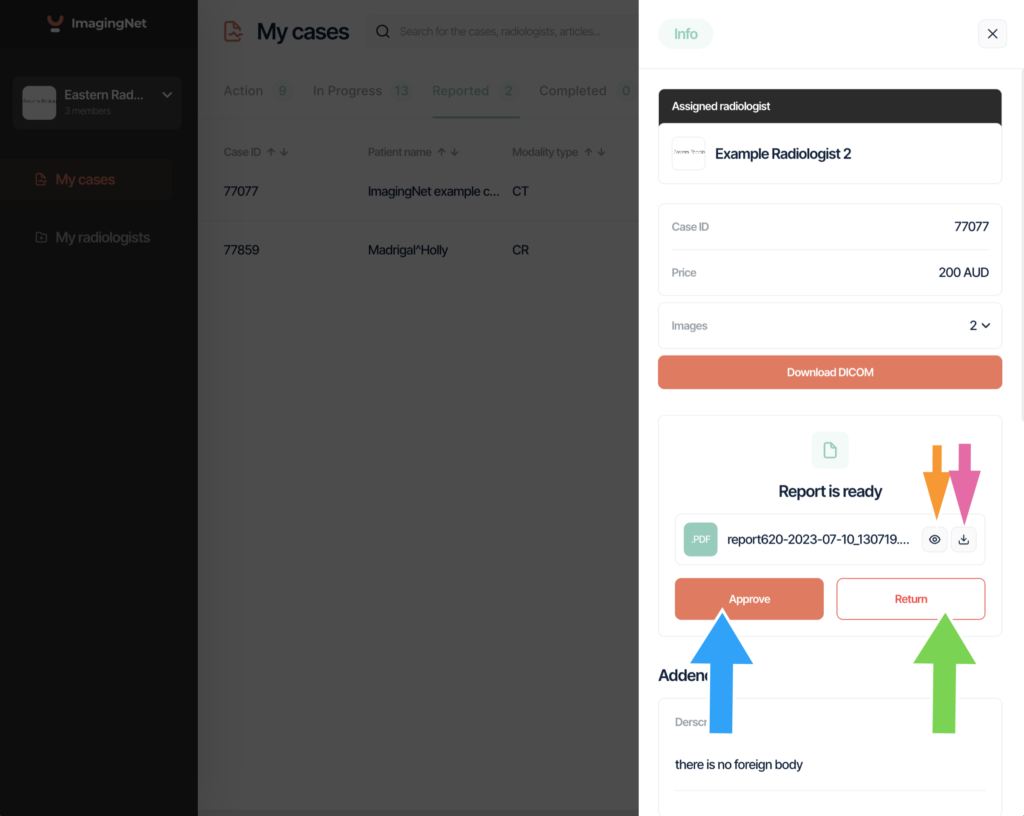
- To view the report, click on the specific case in the “Reported” list. A pop-up window displaying the case details and the report will appear.
- To download the report, click on the icon with a downward-pointing arrow (pink arrow).
- To view the report without downloading it, click on the eye icon (orange arrow).
- If you are satisfied with the report and its findings, you can proceed with approval by clicking the “Approve” button (blue arrow). This action will automatically move the case to the “Completed” list, indicating that you are satisfied with the radiologist’s assessment.
- If you encounter any issues with the report, such as a missed body region or other concerns, click the “Return” button (green arrow). A new window will open, allowing you to provide the reason for returning the report. The radiologist will receive this report, make the necessary amendments, and return it to you for review.
